Wednesday, October 31, 2012

Soy Honey Glazed Salmon and Wasabi Cream Sauce

Pretty tasty. Easy. Quick. Only problem is that it's not a dish that can sit around. Gotta cook it and eat it. NOT spicy :) 


Ingredients
Salmon (however many pieces you like)
Sesame oil 
Olive oil
Black Truffle oil (optional)
Chili Garlic Sauce 
Honey
Soy Sauce 
Cream cheese (Don't use fat-free or low-fat)
Garlic
Wasabi mustard

Marinade
1tbs Chili Garlic Sauce 
1/2 cup Soy Sauce 
2tbs Honey
Whisk marinade together and marinate Salmon for 20-30 mins. MAX.

Wasabi Cream Sauce
1 pkg of cream cheese (don't get fat-free it will be gross)
1tbs of black truffle oil ( or you can use butter)
1tbs of garlic. 
1 1/2 tbs of wasabi (or adjust to your liking)
3tbs water
Saute garlic in black truffle oil. Lower heat and add cream cheese and water. Stir till smooth. Keep ready. 


Heat olive oil and add a splash of sesame oil for flavor. Fry salmon skin side up in the pan. Cook until golden brown on one side, and flip over on the other side, this should take about 3 to 4 minutes on each side.
Pour cream sauce over salmon and serve! 


Steamed mussels as a side. 

Tuesday, October 23, 2012

Cookie Dough Cupcakes


I've never gotten all that excited about cupcakes in the past, but I have found some recipes lately that have really turned out well.  Rich chocolate cake with a chocolate chip cookie dough filling and cookie dough flavored frosting.  If you like cookie dough, you will love these cupcakes!!  This recipe is for 12 cupcakes, but can easily be doubled to make 24.


COOKIE DOUGH FILLING:
3/4 cup all-purpose flour
1/8 teaspoon baking soda
1/8 teaspoon salt
4 tablespoons (1/2 stick) unsalted butter, melted
1/4 cup packed brown sugar
2 tablespoons granulated white sugar
2 tablespoons milk
1 teaspoon vanilla extract
1/2 cup miniature chocolate chips

CUPCAKES:
1 cup all-purpose flour
1/2 cup unsweetened cocoa powder
1 cup granulated white sugar
1/2 teaspoon baking soda
1/4 teaspoon salt
3/4 cup hot water
1/2 cup vegetable or canola oil
1 large egg
1 1/2 teaspoons vanilla extract

COOKIE DOUGH FROSTING:
3/4 cup (1 1/2 sticks) salted butter
1 3/4 cups powdered sugar
1/3 cup packed brown sugar
1/2 cup all-purpose flour
1 1/2 tablespoons milk
1 teaspoon vanilla extract

GARNISH:
additional mini chocolate chips


Directions:

1. Prepare the cookie dough filling (see *Tips below): In a small bowl, whisk together the flour, baking soda and salt. In a medium bowl, use an electric mixer to stir together the butter, sugars, milk and vanilla. Stir in the dry ingredients and the chocolate chips. Refrigerate for 15 to 30 minutes, or until the cookie dough is firm. Scoop out dough in 2 tablespoon scoops and place it on a cookie sheet. Freeze until firm, at least 30 minutes.

2. Prepare the cupcakes: Preheat the oven to 375 degrees F. Line a cupcake pan with 12 liners. Place the flour, cocoa, sugar, baking soda and salt in a blender. Blend to combine. Add the water, oil, egg and vanilla. Blend to combine, scraping down the sides as needed a couple of times until all is well mixed. Divide the batter between the 12 cupcake liners. Drop a ball of frozen chocolate chip cookie dough into the center of each cupcake. If you would like the cookie dough to bake up slightly, keep the top visible. If you'd like to keep the cookie dough somewhat raw, push it to the bottom of the cupcake wrapper, making sure that the batter comes up and over the dough.

3. Bake the cupcakes for 20 to 25 minutes, or until a toothpick inserted into the cupcake portion of the cupcake (not tested through the center where the dough is), comes out fairly clean. Cool the cupcakes completely before adding the frosting. (NOTE:  for me and my oven, I found setting the oven to 350 degrees an cooking for 18 min was about right----you don't want to overcook!)

4. Prepare the frosting: In a medium bowl, use an electric mixer to combine the butter and sugars until smooth and creamy. Mix in the flour, milk and vanilla and continue to mix until all is well combined.

5. Assemble: Frost cupcakes with a knife or scoop the frosting into a piping bag and pipe it on decoratively. Sprinkle mini chips on top and ENJOY!

Tips:

*You don't necessarily have to melt the butter and refrigerate the dough before scooping. The melted butter just helps the sugar dissolve a bit more so you don't have that grainy texture in the cookie dough. It is necessary to freeze it though.
Source: RecipeGirl.com

*I use the Wilton 1M star tip for getting the lovely frosting swirl on the cupcake.


Rating:  * * * * *  Definitely five stars!

Friday, October 19, 2012

Salted Caramel Brownies

This was in a Food Network magazine.  They turned out pretty good - and rich!  I think Rachelle and Betty Ann could handle it, but normal palates, not so sure.  A couple changes I made: I used Paro instead of coffee granules since I didn't have coffee, and sprinkled coarse salt instead of flaked salt over top of the caramel since I didn't have flaked salt either.  (The salt and caramel on top is NECESSARY!  It's the finishing touch.)  These changes seem to have been okay 'cause they turned out good.  (Again, used the author's photo.)


1 c. butter
1 1/3 c. plus 1 c. semisweet chocolate chips, divided
3 oz. unsweetened chocolate
3 extra-large eggs
1 1/2 Tbsp instant coffee granules
1 1/2 Tbsp vanilla
1 c. plus 2 Tbsp sugar
1/2 c. plus 2 Tbsp flour, divided
1 1/2 tsp. baking powder
1/2 tsp. kosher salt
5-6 oz. good caramel sauce
2-3 tsp. flaked sea salt
  1. Preheat oven to 350.  Butter and flour a 9x12x1 1/2 inch baking pan.
  2. Melt the butter, 1 1/3 c. chocolate chips, and the unsweetened chocolate together in a medium bowl set over simmering water.  Allow to cool for 15 minutes.  In a large bowl, stir (do not beat) together the eggs, coffee, vanilla and sugar.  Stir the chocolate mixture into the egg mixture and allow to cool to room temperature.  (It is very important to allow the butter to cool before adding the chocolate chips, or the chips will melt and ruin the brownies.)
  3. In a medium bowl, sift together 1/2 c. of the flour, the baking powder and salt and add to the chocolate mixture.  Toss the remaining 1 c. of chocolate chips with 2 Tbsp flour in a medium bowl and add them to the chocolate mixture.  Spread evenly in the prepared pan.
  4. Bake for 35 minutes, until a toothpick comes out clean.  Don't overbake!
  5. As soon as the brownies are out of the oven, place of the jar of caramel sauce without the lid in a microwave and heat just until it's pourable.  Stir until smooth.  Drizzle the caramel evenly over the hot brownies and sprinkle with the sea salt.  Cool completely and cut into bars.  

Monday, October 15, 2012

Cheesy Chicken and Rice Skillet Dinner with Bacon

WARNING: This is NOT "light"!  So you may want to stop reading here...  I guess it's what they call "Comfort Food".  I made it the other night and Shane really liked it.  It was pretty easy and for the most part uses ingredients on-hand.  (PS: I don't have a sweet camera...so sometimes I just use the author's photo. This is happening.)


1/2 lb Applewood Smoked Bacon
4 Tbsp. unsalted butter
1/4 c. flour
1/2 tsp. kosher salt
1/4 tsp. pepper
1 1/2 c. chicken broth
1 1/2 c., plus 1 c. shredded cheddar cheese
1-2 Tbsp. Hot Sauce (I just used a few sprinkles of flaked red pepper flakes instead...)
2 c. cooked shredded chicken
4 c. steamed white rice

1.  Render bacon, drain and set aside.  Reserve 2 Tbsp. bacon drippings.
2.  Place butter into a medium saucepan over medium heat.  Once melted, whisk in flour, salt, and pepper until smooth and bubbly.  Slowly whisk in chicken broth.  Increase heat to high whisking broth until thickened.  Reduce to low and stir in 1 1/2 c. cheese.  Stir in hot sauce (or pepper flakes).  Reduce heat to a simmer and set aside.
3.  Place reserved 2 Tbsp. bacon drippings back in a large cast-iron skillet.  Stir in cooked rice.  Add chicken and cheese sauce, mixing to combine.  Top with 1 c. cheddar cheese then top with crumbled cooked bacon.  Place under broiler for 3-5 minutes until cheese is melted. Serve immediately.

Makes 6+ large servings.

Thursday, October 11, 2012

My Mom's Chicken Curry and Coconut Rice


Made this for dinner tonight... and it was.. SO good. I honestly never thought I would be able to replicate this in my own kitchen. Also made coconut rice with it. One ingredient I added.. for some salt was Thai fish sauce... I know.. I know it sounds weird but it actually gave it a really good umph! 

Anyway the man of the house loved it.. a lot.  He eats anything... so it's always a huge compliment when he says the meal is really tasty. PLUS-- he's not a fan of chicken...so that makes it even better. 

Also I used a whole chicken... wings/drumsticks and all. With the bones. I think it adds flavor.

I also picked up some chicken kabobs from a local halal market...I'm going to try to tackle making those another time. 

Ingredients:

Onion- 1 large or medium
Ginger / garlic paste- 1 tbs
Cloves- 4
Chilli powder - 3 tbs
Dhania n jeers powder - 1 1/2 tbs
Oil- 5 tbs
Chicken - 2 pounds

Directions
How to:  in large sauce pan heat oil, add chopped onions, fry golden brown, add chili, dhana jeera powders and salt, saute for a minute, add washed, rinsed chicken saute for 5 minutes in It's own juices- add ginger/garlic paste and cloves- stir, and add a cup of water. Cover and cook for 15 minutes. 

Eat with roti, rice - goes wonderful with coconut rice

Coconut Rice
1 1/2 Cup Jasmine Rice or Basmati Rice
1 Can of Coconut Milk
1 Cup of Water
The ratio is about 1:1:1 
1 tbs butter
(optional: cloves 3 or Basil-- adding basil makes it more of a Thai coconut rice .. also yum)


My little helper in the kitchen :)

Chicken Stroganoff

 
Chicken Stroganoff
Ingredients:
4 skinless, boneless chicken breast
halves - cubed
1/8 cup margarine
1 (.7 ounce) package dry Italian-style
salad Dress mix
1 (8 ounce) package cream cheese
1 (10.75 ounce) can condensed cream
of chicken soup
Directions:
1.Put chicken, margarine and dressing mix in slow cooker; mix together and cook on low for 5 to 6 hours.
2.Add cream cheese and soup, mix together and cook on high for another 1/2 hour or until heated through and warm.

Here is a little bit of a different version of stroganoff which I really enjoy.  I don't have a slow cooker so I just cook the chicken in a pan on the stove. I put the dressing on the chicken as it is cooking and then some in the sauce as well, and I think it turns out pretty tasty.

Rating: ****- Super easy to make and pretty tasty as well.


Tuesday, October 9, 2012

Beef Stroganoff


I tried this tonight... it was okay. I'd make it again but with alterations. I would definitely add some garlic, and worchester sauce. I thought it was a little... bland-- it also took about an hour to simmer. It is a quick meal in the sense it doesn't take long to prepare and is super easy.

These are the measurements that serve (6-8) but you can also get serving sizes for your table here.
Ingredients
2 pounds beef chuck roast
1/2 teaspoon salt
1/2 teaspoon ground black pepper
4 ounces butter
4 green onions, sliced (white parts only)
4 tablespoons all-purpose flour
1 (10.5 ounce) can condensed beef
broth

DIRECTIONS:
1.Remove any fat and gristle from the roast and cut into strips 1/2 inch thick by 2 inches long. Season with 1/2 teaspoon of both salt and pepper.
2.In a large skillet over medium heat, melt the butter and brown the beef strips quickly, then push the beef strips off to one side. Add the onions and cook slowly for 3 to 5 minutes, then push to the side with the beef strips.
3.Stir the flour into the juices on the empty side of the pan. Pour in beef broth and bring to a boil, stirring constantly. Lower the heat and stir in mustard. Cover and simmer for 1 hour or until the meat is tender.
4.Five minutes before serving, stir in the mushrooms, sour cream, and white wine. Heat briefly then salt and pepper to taste.
1 teaspoon prepared mustard
1 (6 ounce) can sliced mushrooms,
drained
1/3 cup sour cream
1/3 cup white wine
salt to taste
ground black pepper to taste


Chocolate Roll Up Cake

I have never made this one before but this is Thomas' favorite cake that his mom makes. So, I thought it would be a great contribution to this blog!

Chocolate Roll Cake
1/2 cup flour 1 teaspoon baking powder
1/4 teaspoon salt 1/4 cup cocoa powder

4 egg yolks 1/2 teaspoon vanilla
1/3 cup sugar

4 egg whites 1/2 cup sugar

15x10x1 inch jelly roll pan greased and lightly floured

Sift together the first four ingredients

in a small bowl beat the egg yolks and vanilla at high speed for about 5 minutes, gradually add the 1/3 cup sugar. When you finish beating the yolks, they should be lemony color and the sugar should not be grainy anymore, they will look and feel thicker than when you started beating them. Thoroughly wash the beaters.

In a large mixing bowl, (it works better if it is metal or glass because egg whites will not whip well if there is any trace of oil in the bowl and plastic can hold on to oil even after it is washed, that is also why you need to wash the beaters well) beat the egg whites at medium speed until soft peaks form. Gradually add the 1/2 cup sugar continue beating till stiff peaks form. Gently fold the egg yolks into the egg whites. Sprinkle flour mixture over the mixed together eggs, and gently fold in until it is all thoroughly combined. It will take a few minutes, and when it is all combined, the batter will taste sort of "foamy" not thick like a regular cake batter. If it does not seem sort of foamy or fluffy, you have mixed it too hard and have flattened out all of the air you whipped into the eggs. That airy ness is what gives it the different texture, so you really want to mix it gently.
Spread batter into the pan Bake in a 375 degree oven for 12-15 minutes, don't overbake it or it will be really dry. When it bakes it might not all look even and pretty, but that it okay because that side goes on the inside when it is filled. The under part will be all smooth and pretty so it will look fine.
While the cake is baking, tear off about 5 sheets of paper towels (keep them all connected) sift a light layer of powdered sugar onto the paper towels. When you take the cake out of the oven, loosen the edges with a knife and then immediately turn it out onto the paper towels. Roll the cake up in the paper towels and let it cool for at least an hour. Un roll the cake and use whatever flavor of ice cream to spread evenly across the whole cake, then roll it back up (obviously it is not a super tight roll) then put it in the freezer to freeze for at least an hour. You can also use whipped cream and berries in the middle, although ice cream is the best.

Chicken and Black Bean Green Enchilada Rice Bake


Chicken and Black Bean Green Enchilada Rice Bake


2 cups white long grain rice
2 1/2 cups cooked, shredded chicken breast
One 15-ounce can mild green enchilada sauce
One 4-ounce can sliced black olives
One 15-ounce can diced tomatoes
1/2 cup sour cream
1 teaspoon kosher salt
1/2 teaspoon freshly ground black pepper
1 teaspoon McCormick Gourmet Roasted Ground Cumin
One 15-ounce can black beans, drained and rinsed
2 cups shredded cheddar cheese
1. Preheat oven to 350 degrees F. and spray a 9×13-inch baking dish with non-stick cooking spray.
2. Cook rice according to package directions.
3. Place chicken, enchilada sauce, olives, tomatoes, sour cream, salt, pepper and cumin into a large bowl, mixing to combine. Pour cooked rice into prepared baking dish and layer beans on top of rice. Pour chicken mixture over rice and top evenly with cheddar cheese. Bake for 30 to 35 minutes, until cheese is melted and rice is hot.
Makes 6 to 8 servings

This is super easy to make and really delicious. I made this about a year ago for Grandma and I think Sam and I ate the entire pan pretty much. So, I would say it is a success!

Monday, October 8, 2012

I figured I'd throw some spice into this recipe box:

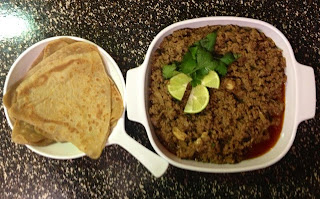
This is my mom's mince meat recipe. It's pretty spicy. Most of the spices you have to get from an Indian grocery store. Colby and I both liked it...but we also like spicy food :)


Keema Recipe:
Onion: 1 cut in to small pieces
Ginger / Garlic paste: 1 tbs spoon
Cloves: 4 or 5
Coriander leaves: Optional
Green chillies : optional
Chillipowder: 2Tbs
Coriander / jeera powder: optional: 1tbs
Garlic cloves : 6 Peeled optional
Mince beef /chicken / turkey : 1 pound
Oil : 4 tbspoon
Salt to taste
heat large skillet , put oil, add onions and stir fry them till till transparent and little brown.Wash ( you
can also microwave mince meat in lots of hotwater so that fat comes off) and add the mince to the
onions. Add salt, chilli powder, coriander and jeera powder, green chillies, peeled garlic cloves mix
well and stir and fry for 3 to 5 minutes, add water ½ cup or ¾ cup. When it’s boiling, add ginger garlic
pasted. Cook for 10 to 15 minutes til it becomes thick with right consistency and cooked. Add Coriander
to garnish. ( You can also add chopped tomatoes / potatoes / capsicum after adding water – tastes
different with each vegetable. )


Sunday, October 7, 2012

BYU Mint Brownies


These brownies need no introduction.  BYU Magazine posted the recipe few years ago.

1 c. margarine
1/2 c. cocoa
2 Tbsp. honey
4 eggs
2 c. sugar
1 3/4 c. flour
1/2 Tbsp. baking powder
1/2 tsp. salt
1 c. chopped walnuts
12 oz. chocolate icing (Use your own icing recipe or purchase some chocolate frosting. You can also search the Internet for chocolate icing recipes.)


MINT ICING
5 Tbsp. margarine
dash of salt
3 Tbsp. milk
1 Tbsp. light corn syrup
2 1/3 c. powdered sugar
1/2 tsp. mint extract
1-2 drops green food coloring

1. Melt margarine and mix in cocoa. Allow to cool. Add honey, eggs, sugar, flour, baking powder, and salt. Mix well. Add nuts. Pour batter into a greased 9-by-13 baking pan. Bake at 350 degrees for 25 minutes. Cool.

2. Prepare mint icing: Soften margarine. Add salt, corn syrup, and powdered sugar. Beat until smooth and fluffy. Add mint extract and food coloring. Mix. Add milk gradually until the consistency is a little thinner than cake frosting.

3. Spread mint icing over brownies. Place brownies in the freezer for a short time to stiffen the icing. Remove from the freezer and carefully add a layer of chocolate icing.


Nutrition Information:  I'm not going to bother calculating the calories for this one.  Don't even make them if you are watching your figure because you won't be able to control yourself. :)

 
Rating: ***** Five Stars!!!

PF Chang's Lettuce Wraps


I love the lettuce wraps from PF Chang's/Pei Wei.  This copycat recipe isn't exactly the same, but it is pretty close and has way less oil than the real thing!


1 lb ground chicken breast
1/2 onion chopped
2 T minced garlic
1 T soy sauce
1/4 cup hoisin sauce
1 tsp minced fresh ginger
1 T rice vinegar
2 tsp Asian chili pepper sauce (rooster sauce)
1 can sliced water chestnuts, drained and finely chopped
4 oz mushrooms, washed and chopped
1/2 bunch green onions, thinly sliced
2 tsp sesame oil

Cook chicken in a large skillet over medium heat, stirring often to break up the meat.  Add onion, garlic, soy sauce, hoisin sauce, ginger, vinegar and chili sauce.  Cook until the meat is crumbled and brown.  Add water chestnuts, mushrooms and green onions.  Cook until onions begin to wilt, about 2 minutes.

Stir in sesame oil.  Serve with lettuce leaves.

Note:  I often make this with ground turkey since it is easier to find.  I don't really notice a difference in taste.  The hoisin sauce, soy sauce, chili pepper sauce, sesame oil and water chestnuts can all be found in the Asian food section of the grocery store.  Fresh ginger is in the produce section---you can buy it fresh and grate it yourself, but I usually just get the little tubes of ground ginger found in the refrigerated produce section (usually next to other herbs).

Nutrition Information:  (for 1/4th of the recipe) Calories:  200, Fat: 4 g, Carb 11 g, Fiber, 1 g, Sugar 5 g, Protein 30 g

Rating:  ***** Five Stars  I could eat this every week!

Pumpkin Pancakes


2 cups flour
2 T sugar
4 tsp baking powder
1 tsp salt
1 1/2 tsp pumpkin pie spice
2 cups milk
1 cup pumpkin puree
1 tsp vanilla
4 eggs--separated
1/4 cup melted butter

Sift together dry ingredients. Combine milk, egg yolks, vanilla, butter and pumpkin puree. Stir into dry ingredients until just blended. Beat egg whites until stiff and fold into batter. Pour onto hot, oiled griddle about 1/3 cup at a time. Cook until tops bubble and turn and cook other side. (Note: sometimes I don't bother to separate the eggs and the pancakes still turn out great!)

These taste great with syrup, but my kids favorite way to eat them is to sprinkle mini chocolate chips on the warm pancakes, let them melt a little bit and then top with a dollop of whip cream. YUM!

Rating:  **** Four Stars--These are delish but a little time consuming to make.  I usually save them for special occasions

Sinfully Rich Chocolate Truffle Pie


I made this pie for Thanksgiving dinner last year and it was amazingly easy and so delicious!

12 ounces Semi-Sweet Chocolate Chips
1 1/2 cups Heavy Whipping Cream
1/4 cup Powdered Sugar
1 T Vanilla
1 (9-inch) Prepared Chocolate Cookie Crumb Crust (or make your own using 1 1/2 cups Oreo cookie crumbs and 1/4 cup melted butter)

1. In microwave dish combine chocolate chips and 1/2 of the cream. Cook on high for 1 to 2 minutes, stirring every 30 seconds until smooth. Cool to room temperature. Stir in sugar & vanilla. Set aside.

2. In small bowl, beat the rest of the cream until soft peaks form. Beat in chocolate mixture on high speed 1/3 at a time. mix well and spoon into crust.

3. Refrigerate at least 8 hours before serving. Garnish with whipped cream and chocolate curls if desired.

Enjoy!

Rating:  ***** Five Stars for sure!  My thighs couldn't handle me making this recipe every week, but it will definitely be my go-to recipe when I need a pie!

Welcome to the Curtis Cooking Blog!

In an attempt to help answer the age-old question of "What's for dinner??" I decided it was high time the Curtis family had a cooking blog.  Please feel free to share any and all of your great recipes!  Here are a few posting guidelines:

Required:  To make finding recipes easier, please add labels to your recipes for genre (main dish, dessert, bread, appetizer, soup, salad, etc.) meat type, if applicable (chicken, beef, fish, etc) and meal type (breakfast, lunch, dinner)  More than one label can be given, for example if your dish could be considered both lunch and dinner.  

Optional: Picture(s)--pictures are great, but don't feel like you have to have a picture to post a recipe.

Optional:  Nutritional Information.  This site is really helpful for figuring it out--just cut and paste the recipe and it calculates everything for you. 

Optional: Rating: (If you rate your recipe, also include the stars as a label so it will be searchable)
            ***** = Five Stars = I love this dish and would make it every week if I could!
              **** = Four Stars = This is a tasty dish, and I will make it often
                *** = Three Stars = This dish is OK.  I would make it once every few months
                  ** = Two Stars = Edible, but won't make it again
                    * = One Star = Super gross, couldn't even finish it

Happy Cooking!